
实现方法1:
使用VBA中的FileSystemObject对象,可以遍历指定文件夹中的所有文件,并通过修改文件名来达到批量修改图片名的目的。
Sub BatchRenameImages()
    Dim FSO As Object
    Dim SourceFolder As Object
    Dim File As Object
    Dim NewName As String

    ' 设置文件夹路径
    Set FSO = CreateObject("Scripting.FileSystemObject")
    Set SourceFolder = FSO.GetFolder("C:\\Images")

    ' 遍历文件夹中的每一个文件
    For Each File In SourceFolder.Files
        ' 检查文件是否为图片文件
        If InStr(1, File.Name, ".jpg", vbTextCompare) > 0 Or InStr(1, File.Name, ".jpeg", vbTextCompare) > 0 Or InStr(1, File.Name, ".png", vbTextCompare) > 0 Then
            ' 修改文件名,自定义修改规则
            NewName = "NewPrefix_" & File.Name
            ' 修改文件名
            Name File.Path As SourceFolder & "\\" & NewName
        End If
    Next File

    ' 释放对象
    Set File = Nothing
    Set SourceFolder = Nothing
    Set FSO = Nothing
End Sub
实现方法2:
使用VBA中的Dir函数和Name语句,可以逐个遍历文件夹中的文件,并通过修改文件名来实现批量修改图片名的需求。
Sub BatchRenameImages()
    Dim SourcePath As String
    Dim FileName As String
    Dim NewName As String

    ' 设置文件夹路径
    SourcePath = "C:\\Images\\"

    ' 获取第一个文件
    FileName = Dir(SourcePath & "*.jpg")

    ' 遍历文件夹中的每一个文件
    Do While FileName <> ""
        ' 修改文件名,自定义修改规则
        NewName = "NewPrefix_" & FileName
        ' 修改文件名
        Name SourcePath & FileName As SourcePath & NewName
        ' 获取下一个文件
        FileName = Dir()
    Loop
End Sub
实现方法3:
实施方案:
EXCEL中,采用VBA+ImageMagick软件的命令行语句,压缩图片文件并改名。
概要说明:
1、处理每个房间时,在A2单元格中输入相应的房间号,图文件以此为基础顺序编号。
2、添加了一个进度条控件,可以动态查看程序执行进度。
3、添加一个按钮控件【CommandButton1】,单击即可执行主程序。
![图片[1]-vba批量修改图片名-曙光学习苑](https://www.zgqtz.com/wp-content/uploads/2025/11/v2-2f7dae48f937977cb7e77dac80daa4ef_1440w.jpg)
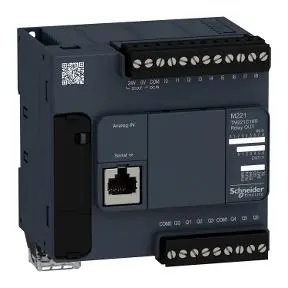
4、因为调用了控件,所以在VBE界面中,添加两个引用,如下图所示:
![图片[2]-vba批量修改图片名-曙光学习苑](https://www.zgqtz.com/wp-content/uploads/2025/11/v2-d2449c564293b55a3ce8723f012d71ba_1440w.jpg)
5、对文件和文件夹的操作方式是后声明,这样带有宏的EXCEL文件复制到其他电脑也可直接用,不用在VBE编辑器中添加对FSO的引用。
Set fso = CreateObject(“Scripting.FileSystemObject”)
具体代码:
1、【批量时间和房间号水印,改名称】按钮对应的代码如下:
(时间采用照片拍摄时的时间,采用 ImageMagick 的 identify 命令获取图片的拍摄日期)
Private Sub CommandButton1_Click()
    Dim sourceFolder As String
    Dim fileName As String
    Dim filePath As String
    Dim watermarkText As String
    Dim shell As Object
    Dim command As String
    Dim TargetFolder As String, TargetPath As String
    Dim Num1 As Integer
    Dim ClassRoom As String
    Dim exifDate As String
    Dim logFilePath As String
    Dim fso As Object
    Dim logFile As Object
    Dim FileCount As Long


    ' 初始化进度条
    ProgressBar1.Min = 0
    ProgressBar1.Max = 9
    ProgressBar1.Value = 0
    'ProgressBar1.Visible = True

    ProgressBar1.Activate

    '压缩图片
    BatchCompressImages
    ProgressBar1.Value = 6

    ' 设置源文件夹路径
    sourceFolder = ThisWorkbook.Path & "\11\"
    TargetFolder = ThisWorkbook.Path & "\22\"
    logFilePath = ThisWorkbook.Path & "\process_log.txt" ' 日志文件路径
    Num1 = 1
    FileCount = 0
    ClassRoom = Trim(ThisWorkbook.Sheets("remark").Range("a2").Value)

    ' 创建 Shell 对象
    Set shell = CreateObject("WScript.Shell")

    ' 创建 FileSystemObject 对象
    Set fso = CreateObject("Scripting.FileSystemObject")

    ' 创建日志文件(如果不存在)
    If Not fso.FileExists(logFilePath) Then
        Set logFile = fso.CreateTextFile(logFilePath, True)
        logFile.WriteLine "===== 日志开始 ====="
        logFile.Close
    End If

    ' 打开日志文件用于追加写入
    Set logFile = fso.OpenTextFile(logFilePath, 8, True) ' 8 表示追加模式

    ' 遍历文件夹中的所有 JPG 文件
    fileName = Dir(sourceFolder & "*.jpg")

    Do While fileName <> ""
        FileCount = FileCount + 1
        fileName = Dir() ' 获取下一个 .jpg 文件
    Loop
    If FileCount = 0 Then
        FileCount = 1
    End If
    ProgressBar1.Max = FileCount
    ProgressBar1.Value = 0
    fileName = Dir(sourceFolder & "*.jpg")
    Do While fileName <> ""
        logFile.WriteLine "找到文件: " & fileName ' 调试信息

        filePath = sourceFolder & fileName
        TargetPath = TargetFolder & ClassRoom & "_" & Trim(Str(Num1)) & ".jpg"

        ' 检查文件是否存在(使用 FileSystemObject)
        If Not fso.FileExists(filePath) Then
            MsgBox "文件不存在: " & filePath, vbExclamation
            logFile.WriteLine "错误: 文件不存在 - " & filePath
            Exit Sub
        End If

        ' 使用 ImageMagick 的 identify 命令获取图片的拍摄日期
        command = "magick identify -format ""%[EXIF:DateTimeOriginal]"" """ & filePath & """"

        ' 使用 Exec 方法执行命令并获取输出
        Dim exec As Object
        Set exec = shell.exec(command)
        exifDate = exec.StdOut.ReadLine
        exifDate = Mid(exifDate, 1, 4) & "-" & Mid(exifDate, 6, 2) & "-" & Mid(exifDate, 9, 2) & " " & Mid(exifDate, 12, 2) & ":" & Mid(exifDate, 15, 2)

        ' 检查是否获取到拍摄日期
        If exifDate = "" Then
            ' 如果没有获取到拍摄日期,使用当前日期
            exifDate = Format(Now(), "YYYY-MM-DD HH:MM")
        End If

        ' 设置水印文本(拍摄日期 + 教室编号)
        watermarkText = ClassRoom & "  \n\n" & exifDate
        'watermarkText = "  \n" & ClassRoom


        ' 构建 ImageMagick 命令
        command = "magick """ & filePath & """ -font ""C:\Windows\Fonts\simsun.ttc"" -fill red -pointsize 222 -gravity South -annotate +0+10 """ & watermarkText & """ """ & TargetPath & """"
        'command = "magick """ & filePath & """ -font ""C:\Windows\Fonts\simsun.ttc"" -fill red -pointsize 122 -gravity SouthEast -annotate +0+0  """ & watermarkText & """ """ & TargetPath & """"


        ' 执行命令
        Dim exitCode As Integer
        exitCode = shell.Run(command, 1, True)

        ' 记录日志
        logFile.WriteLine "处理文件: " & filePath
        logFile.WriteLine "目标文件: " & TargetPath
        logFile.WriteLine "退出代码: " & exitCode
        logFile.WriteLine "处理时间: " & Now()
        logFile.WriteLine "------------------------"

        ' 获取下一个文件
        fileName = Dir()
        If fileName = "" Then
            logFile.WriteLine "没有更多文件" ' 调试信息
        End If
        Num1 = Num1 + 1
        ProgressBar1.Value = ProgressBar1.Value + 1
    Loop

    ' 关闭日志文件
    logFile.Close

    'MsgBox "所有图片已成功添加水印!日志已保存到: " & logFilePath, vbInformation

    'ClearFolder
End Sub
2、压缩图片的代码:
调用powershell压缩,压缩质量是30(质量越好,文件越大),防止系统资源冲突,每压缩一个图片,强制停顿2秒。
Sub BatchCompressImages()
    Dim psScript As String
    Dim inputFolder As String
    Dim outputFolder As String
    Dim quality As Integer
    Dim imgFile As String
    Dim waitTime As Integer

    ' 设置输入和输出文件夹
    inputFolder = ThisWorkbook.Path & "\00\"    ' 原图目录
    outputFolder = ThisWorkbook.Path & "\11\"  ' 压缩后目录
    quality = 30  ' 压缩质量(1-100)


     waitTime = 2

    ' 检查输出目录是否存在
    If Dir(outputFolder, vbDirectory) = "" Then
        MkDir outputFolder
    End If

    ' 遍历目录中的所有图片文件
    imgFile = Dir(inputFolder & "*.*")  ' 获取所有文件
    Do While imgFile <> ""
        ' 只处理jpg/jpeg/png文件
        If LCase(Right(imgFile, 4)) = ".jpg" Or LCase(Right(imgFile, 5)) = ".jpeg" Or LCase(Right(imgFile, 4)) = ".png" Then
            CompressSingleImage inputFolder & imgFile, outputFolder & imgFile, quality
            Application.Wait Now + TimeValue("00:00:" & waitTime) '防止系统资源冲突,每压缩一个图片,强制停顿2秒
        End If
        imgFile = Dir()
    Loop

    'MsgBox "图片压缩完成!保存至:" & outputFolder, vbInformation
End Sub

Sub CompressSingleImage(inputPath As String, outputPath As String, quality As Integer)
    Dim psScript As String
    Dim logFile As String

    ' 根据文件类型使用不同的压缩方式
    If LCase(Right(inputPath, 4)) = ".png" Then
        ' PNG格式 - 直接保存,不使用质量参数
        psScript = _
            "$inputPath = '" & inputPath & "'; " & _
            "$outputPath = '" & outputPath & "'; " & _
            "Add-Type -AssemblyName System.Drawing; " & _
            "try { " & _
            "   $image = [System.Drawing.Image]::FromFile($inputPath); " & _
            "   $codec = [System.Drawing.Imaging.ImageCodecInfo]::GetImageEncoders() | " & _
            "       Where-Object { $_.FormatDescription -eq 'PNG' }; " & _
            "   $image.Save($outputPath, $codec); " & _
            "   $image.Dispose(); " & _
            "   Write-Output 'PNG压缩成功: $outputPath'; " & _
            "} catch { " & _
            "   Write-Error ('PNG压缩失败: ' + $_.Exception.Message); " & _
            "   exit 1; " & _
            "}"
    Else
        ' JPG/JPEG格式 - 使用质量参数压缩
        psScript = _
            "$inputPath = '" & inputPath & "'; " & _
            "$outputPath = '" & outputPath & "'; " & _
            "$quality = " & quality & "; " & _
            "Add-Type -AssemblyName System.Drawing; " & _
            "try { " & _
            "   $image = [System.Drawing.Image]::FromFile($inputPath); " & _
            "   $codec = [System.Drawing.Imaging.ImageCodecInfo]::GetImageEncoders() | " & _
            "       Where-Object { $_.FormatDescription -eq 'JPEG' }; " & _
            "   $encoderParams = New-Object System.Drawing.Imaging.EncoderParameters(1); " & _
            "   $encoderParams.Param[0] = New-Object System.Drawing.Imaging.EncoderParameter(" & _
            "       [System.Drawing.Imaging.Encoder]::Quality, $quality); " & _
            "   $image.Save($outputPath, $codec, $encoderParams); " & _
            "   $image.Dispose(); " & _
            "   Write-Output 'JPEG压缩成功: $outputPath'; " & _
            "} catch { " & _
            "   Write-Error ('JPEG压缩失败: ' + $_.Exception.Message); " & _
            "   exit 1; " & _
            "}"
    End If

    ' 执行PowerShell并记录日志
    logFile = ThisWorkbook.Path & "\compress_log.txt"
    shell "powershell.exe -NoProfile -ExecutionPolicy Bypass -Command ""& {" & psScript & "} 2>> '" & logFile & "'""", vbHide
End Sub
3、最后调用ClearFolder,清空中间步骤(压缩图片)产生的临时文件、原始图片文件:
Sub ClearFolder()
    Dim fso As Object
    Dim folderPath As String
    Dim folder As Object
    Dim file As Object

    ' 设置文件夹路径
    folderPath = ThisWorkbook.Path & "\11\"   ' 替换为你的文件夹路径

    ' 创建FileSystemObject对象
    Set fso = CreateObject("Scripting.FileSystemObject")

    ' 检查文件夹是否存在
    If fso.FolderExists(folderPath) Then
        Set folder = fso.GetFolder(folderPath)

        ' 遍历文件夹中的所有文件并删除
        For Each file In folder.Files
            file.Delete
        Next file

        'MsgBox "文件夹中的所有文件已清空。"
    Else
        'MsgBox "文件夹不存在。"
    End If

    ' 设置文件夹路径2
    folderPath = ThisWorkbook.Path & "\00\"   ' 替换为你的文件夹路径

    ' 检查文件夹是否存在
    If fso.FolderExists(folderPath) Then
        Set folder = fso.GetFolder(folderPath)

        ' 遍历文件夹中的所有文件并删除
        For Each file In folder.Files
            file.Delete
        Next file

        'MsgBox "文件夹中的所有文件已清空。"
    Else
        'MsgBox "文件夹不存在。"
    End If

    Set fso = Nothing
End Sub
为使程序显示在调用命令行窗口,所以没有将命令行窗口隐在后台执行,代码成熟运行一段时间后,可以将命令行窗口隐藏在后台执行。
还需要在工作中不断完善此代码,请大家不吝指正,欢迎更多的建议或需求^_^
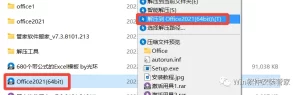
压缩并加了水印的照片示例:
![图片[3]-vba批量修改图片名-曙光学习苑](https://www.zgqtz.com/wp-content/uploads/2025/11/v2-e8d95a057e7ef1d3d12428d1892489ee_1440w.jpg)
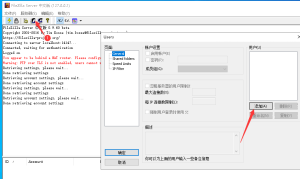
压缩前文件是2.62MB:
![图片[4]-vba批量修改图片名-曙光学习苑](https://www.zgqtz.com/wp-content/uploads/2025/11/v2-76158c75f6365a3fa1128b03d6507247_1440w.jpg)
压缩后的文件是316KB:
![图片[5]-vba批量修改图片名-曙光学习苑](https://www.zgqtz.com/wp-content/uploads/2025/11/v2-35aab99332daf540f64ad290efde3cad_1440w.jpg)
- 1、 本站的文章部分内容均来源于网络,仅供大家学习与参考,如有侵权,请联系站长:QQ932926588,邮箱同号。
- 2、 本站一切资源不代表本站立场,并不代表本站赞同其观点和对其真实性负责。
- 3、 本站一律禁止以任何方式发布或转载任何违法的相关信息,访客发现请向站长举报
- 4、 本站资源大多存储在云盘,如发现链接失效,请联系我们会第一时间更新。


暂无评论内容